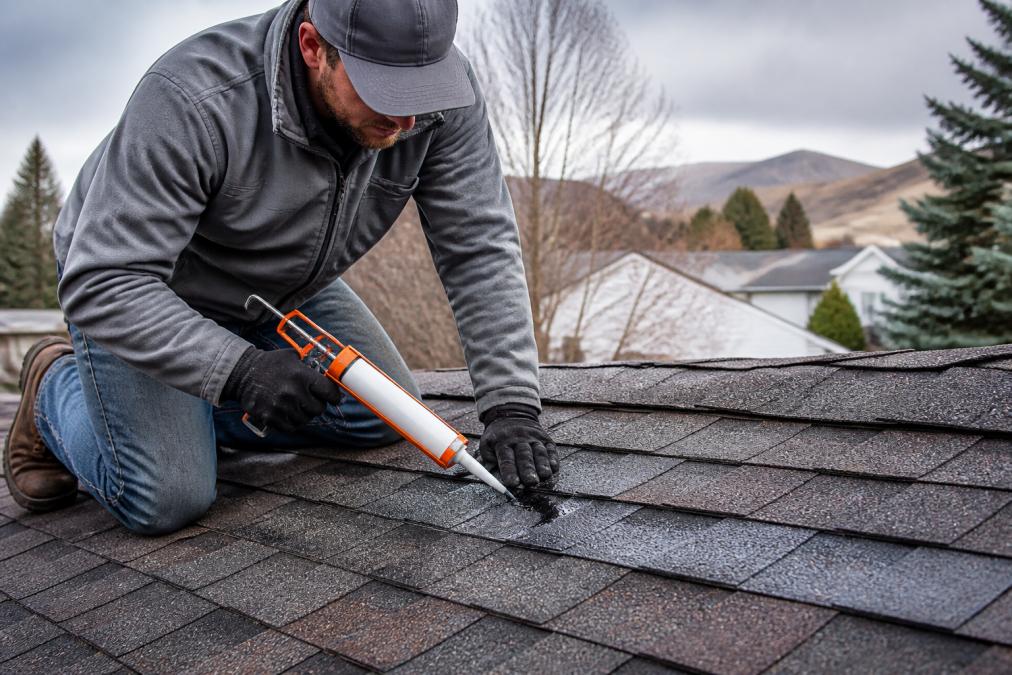
 how-to
How to Stop Roof Leaks: 7-Step Repair Guide for 2026
Table of Contents
- How to Stop Roof Leaks: Start With Attic Inspection
- Roof Leak Detection Methods That Pinpoint the Source
- Emergency Roof Leak Repair: What to Do During Heavy Rain
- Best Roof Sealant for Leaks: Matching Product to Material
- Fixing Flashing, Vent Boots, and Pipe Collars
- Preventative Roof Maintenance Tips to Avoid Future Leaks
- When to Call a Professional for Roof Leak Repair
- Frequently Asked Questions
Last Updated: September 14, 2026
How to Stop Roof Leaks: Start With Attic Inspection
Learning how to stop roof leaks starts in the attic, not on the roof. Water rarely enters where the interior stain appears, so tracing the path backward is the only reliable way to find the true entry point before you climb a ladder.
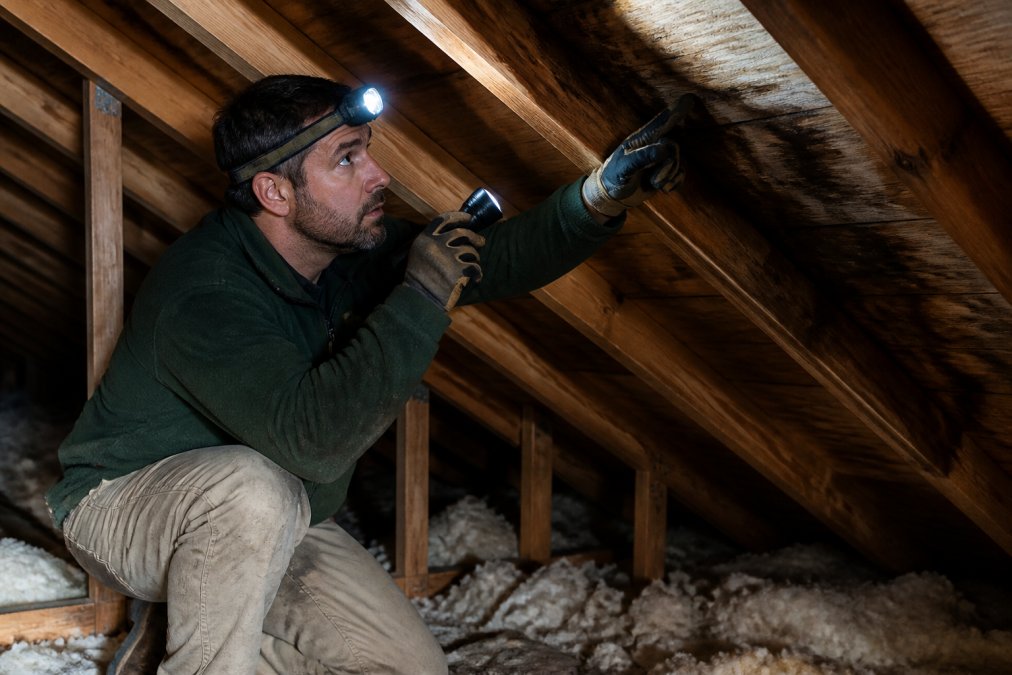
Most "roof leaks" are actually flashing or penetration failures, not failed shingles. Grab a headlamp, gloves, and a notepad, and go up during or right after a rainstorm if it's safe. The NRCA roof inspection guidance recommends documenting every stain, drip, and discoloration before touching anything.
Trace Water Stains Back to the Entry Point
Water travels along rafters, decking, and insulation before it drips. A stain on the ceiling below a bathroom vent usually means the leak is uphill from that vent, often several feet away. Work methodically: find the highest point of every water stain, then look for a matching trail above it on the roof decking. Mark each spot with chalk so you can match interior evidence to exterior findings once you're on the roof.
Check Underlayment and Roof Decking for Rot
Soft, spongy decking means long-term water infiltration, not a fresh leak. Probe suspect areas with a screwdriver. If it sinks easily, the roof decking has rotted and needs replacement, not just a patch. Check the underlayment around every penetration: pipe collars, vent boots, and chimneys are the most common failure points because the rubber and sealant around them dry out and crack within a decade.
Roof Leak Detection Methods That Pinpoint the Source
The most reliable roof leak detection methods combine a garden hose test with a partner inside the attic watching for drips. Start low on the roof and work upward in sections, soaking one area at a time for several minutes before moving on. This isolates the exact entry point instead of guessing.
For active leaks during a storm, look for the classic signs: water stains on ceiling drywall, bubbling paint, musty odors, and damp insulation. A moisture meter helps confirm hidden water in decking and drywall. Check roof valleys, step flashing along walls, and drip edge for gaps. If the leak only appears during wind-driven rain, suspect horizontal surfaces and sidewall flashing rather than shingle failure.
Emergency Roof Leak Repair: What to Do During Heavy Rain
Emergency roof leak repair during a storm is about stopping water damage and preserving your insurance claim, not fixing the roof permanently. Every action you take in the first hour affects both how much damage the house absorbs and how much of it gets reimbursed.
Step 1: Contain the Water Inside
Get a bucket, a tarp, and towels under the drip before you do anything else. Move furniture, electronics, and rugs out of the path. If the ceiling drywall is bulging or sagging, do not wait for it to fail on its own. Turn off power to that room at the breaker, then puncture a small hole at the lowest point of the bulge with a screwdriver or nail to release trapped water in a controlled stream. A bulging ceiling holds several gallons; when it lets go, it takes the drywall, insulation, and anything beneath it.
Lay plastic sheeting on the floor and run a fan and dehumidifier if you have them. Mold can begin colonizing wet drywall and framing within 24 to 48 hours, so drying starts the same day, not after the storm passes (the EPA).
Step 2: Tarp the Roof by Material
If it is safe to go up, tarping is the fastest temporary fix. The method changes with the roof surface:
- Asphalt shingles: Lay a heavy-duty polyethylene tarp over the affected area and extend it at least 4 feet past the leak on all sides and over the ridge if possible. Secure it with 2x4 furring strips screwed into the decking at the edges, or weigh the perimeter with sandbags. Never nail or screw through the tarp into the shingle field itself; the fasteners create new penetrations.
- Metal roofing: Do not walk on wet metal panels; they are slick and the seams can cut. Use magnetic tarp anchors or weighted sandbags along the ribs rather than screwing into the panels. Tape seams with butyl flashing tape only as a short-term measure, because UV degrades it quickly.
- Flat or low-slope roofs: Water ponds, so the tarp must be pitched to drain. Weight the low edge and leave a deliberate low corner as a drain path. Do not trap water against the membrane.
For small, accessible leaks, roofing cement applied to the suspect area can hold until the weather clears, but only on a dry surface. Sealant will not bond to wet shingles or metal.
Step 3: Document Everything for Your Insurance Claim
This is the step most DIY guides skip, and it is the one that determines whether your claim gets paid. Photograph and video the following before you tarp, patch, or clean anything:
- The active leak and the drip path.
- Every water stain on ceilings, walls, and attic decking, with a tape measure or coin in frame for scale.
- Damaged personal property, including furniture, electronics, and flooring.
- The temporary repair itself, once it is in place.
Keep a written log with dates and times. Save receipts for tarps, buckets, fans, dehumidifiers, and any emergency materials you buy; many policies reimburse reasonable mitigation costs. Do not throw away damaged items until an adjuster has seen them or you have been told to dispose of them.
What Not to Do
- Do not climb a wet, steep, or icy roof. A fall is a worse outcome than water damage.
- Do not seal over wet surfaces; the patch will fail and can hide the leak from the adjuster.
- Do not make permanent repairs before the adjuster documents the damage, unless the insurer authorizes it.
- Do not assume a small stain is a small leak. Water travels along framing, so the entry point is often several feet from the drip.
Best Roof Sealant for Leaks: Matching Product to Material
The best roof sealant for leaks depends entirely on your roofing material. Asphalt shingles, metal panels, and spray foam each require different products, and using the wrong one causes adhesion failure within a season.
| Roof Material | Recommended Sealant | Best For | Watch Out For |
|---|---|---|---|
| Asphalt shingles | Asphalt-based roofing cement | Flashing, valleys, nail heads | Not for metal or foam |
| Metal roofing | Urethane or silicone sealant | Seams, fasteners, penetrations | Avoid asphalt products |
| Spray foam | Acrylic or silicone coating | Punctures, seams, UV wear | Needs recoating over time |
| Flashing (all types) | Polyurethane sealant | Step and counter-flashing | Must be clean and dry |
Apply roofing cement with a trowel or caulking gun in dry conditions above the manufacturer's minimum temperature. Clean the surface first; sealant won't bond to dirt, moss, or loose granules. Press the sealant into gaps rather than laying it on top, and feather the edges so water can't work underneath.
Fixing Flashing, Vent Boots, and Pipe Collars
Flashing failures cause more leaks than shingle damage on most roofs. Step flashing runs along sidewalls and chimneys, and when it lifts or corrodes, water flows straight into the structure. Reseat loose flashing, replace rusted sections, and seal the top edge, never the bottom, so water can drain out.
Vent boots and pipe collars are the other repeat offenders. The rubber gasket around a plumbing vent cracks from UV exposure and heat cycling. If the boot is intact but the seal has failed, re-caulk the base with roofing cement. If the rubber is cracked or missing, replace the entire boot. It's a small part, and a fresh one outlasts any patch by years.
Preventative Roof Maintenance Tips to Avoid Future Leaks
Preventative roof maintenance tips are cheaper than any repair, and they take an afternoon twice a year. Clean gutters every spring and fall so water doesn't back up under the drip edge. Trim overhanging branches that scrape shingles and drop debris.
Walk the roof after every major storm and check for lifted shingles, cracked sealant, and loose flashing. Replace damaged shingles promptly, and reapply roofing cement to any penetration that looks dry or cracked. Keep the attic ventilated so moisture doesn't condense on the underside of the roof decking and rot it from within. According to FEMA's guidance on roof maintenance and storm damage, regular inspections after severe weather catch most failures while they're still minor.
When to Call a Professional for Roof Leak Repair
Call a professional when the leak source is unclear, when the roof pitch is steep, or when you find rot in the decking or structural members. DIY repair makes sense for a single cracked vent boot or a lifted shingle. It stops making sense the moment water has been entering for weeks, because hidden rot spreads and the repair scope grows with it.
Signals That the Job Has Outgrown DIY
- Multiple leaks at once. One leak is usually a single failed component. Three or more in different areas often means the underlayment or flashing system has reached end of life.
- Leaks around chimneys, valleys, or sidewalls. These areas require layered flashing that has to be woven into the shingle courses. A surface caulk patch buys weeks, not years.
- Rot in decking or framing. Soft sheathing cannot be patched; it has to be cut out and replaced, which means removing shingles above it.
- Steep or fragile roofs. Anything above a moderate pitch, or any roof with brittle, granule-depleted shingles, is a fall risk and a damage risk.
- Commercial, agricultural, or low-slope membrane roofs. These systems use different materials and detailing than residential shingles, and a homeowner-grade sealant will not perform on them.
- A leak that returns after two patches. The entry point has not been found. More sealant will not fix a misdiagnosed leak.
What a Professional Inspection Should Include
A competent roofer will not quote from the driveway. Expect an inspection that covers the attic interior as well as the roof surface, a moisture meter reading on suspect decking, and photos of every defect found. Ask for the photos; they are also what your insurance adjuster will want to see. A written scope should separate the emergency repair from the permanent repair and list the materials by type, not just "sealant."
Repair, Restoration, or Replacement
Not every leaking roof needs a tear-off. The decision usually comes down to age, extent of rot, and how many failure points exist:
- Targeted repair fits a roof under roughly half its expected service life with one or two isolated failures.
- Restoration fits an aging roof that is structurally sound but has widespread surface deterioration. Spray foam restoration, for example, can seal an existing roof, add insulation value, and extend its life without a full teardown, which can save property owners up to half the cost of a new roof.
- Replacement is the right call when the decking is rotted across large areas, when the roof is at or past its expected service life, or when repairs have already been attempted repeatedly.
Get at least two written estimates and compare the scope line by line, not just the bottom line. A low bid that omits decking replacement or new flashing is not a lower price; it is a smaller job.
Working With Your Insurer on a Professional Repair
If the leak is storm-related, tell the contractor before work begins that you intend to file a claim. A professional can document the damage with dated photos, moisture readings, and a written scope that matches what adjusters look for. Keep the emergency mitigation separate from the permanent repair on the invoice; insurers typically handle them differently. Do not sign a contract that assigns your claim benefits to the contractor unless you fully understand what you are signing.
Sun Flex Home Improvement has spent over 25 years helping property owners across Montana and Northern Wyoming seal problem roofs without a full teardown, and the team can assess whether a repair, restoration, or replacement is the right call.
Frequently Asked Questions
How do you stop a leaking roof during heavy rain?
Move valuables and use buckets to contain the water. If safe, go into the attic and place a tarp or plastic sheeting under the leak, sloping it toward a drain. Do not get on the roof during heavy rain or lightning. For emergency roof leak repair, apply roofing cement or a peel-and-stick patch from inside the attic if you can reach the leak source. Call a professional once the storm passes.
What is the best thing to stop a roof leak?
The best fix depends on the source. For small gaps around flashing or vent boots, roofing cement combined with a patch works well. For larger or recurring leaks, a spray foam roof restoration can be a cost-effective alternative to complete roof replacement. Identify the leak with roof leak detection methods first, then choose the repair material that matches your roof type and damage extent.
Does homeowners insurance cover roof leaks?
Most policies cover sudden damage from storms, hail, or fallen limbs, but not leaks caused by neglect or normal wear. Document the damage with photos and dates before making temporary repairs. Keep receipts for materials. Your insurer may require a professional inspection report. Review your policy or call your agent to confirm coverage before filing a claim.
When should I call a professional for roof repair?
Call a professional if the leak returns after two DIY attempts, if water has saturated insulation or ceiling drywall, or if the leak is near valleys, chimneys, or complex flashing. Roof pitch above 6:12, heights over one story, or any structural sagging also warrant expert help. A roofing contractor can perform a full inspection and recommend restoration versus replacement.